

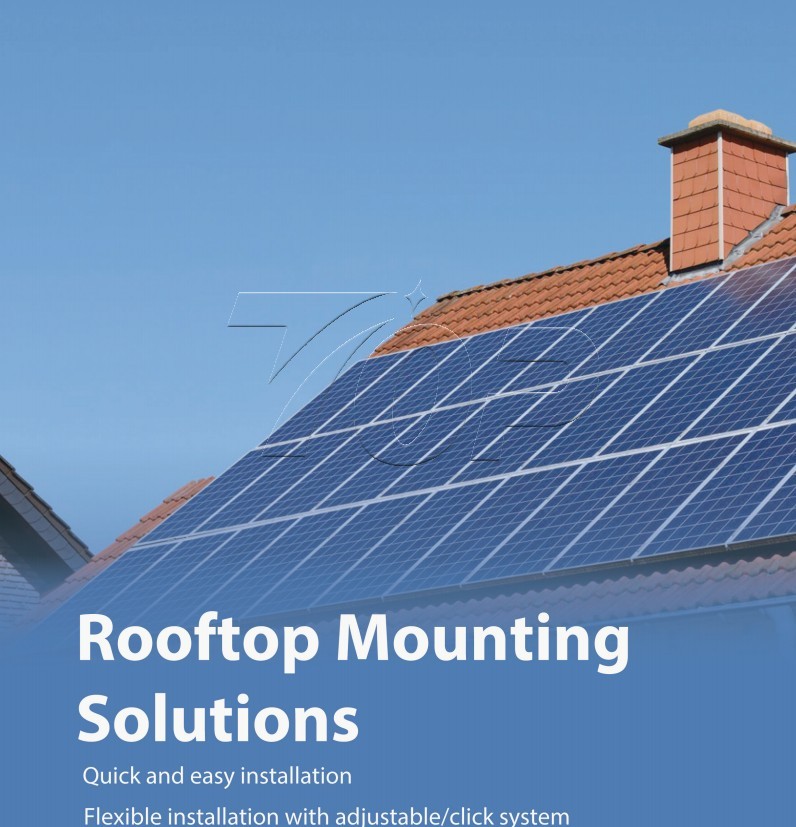
How to Install Solar Panel Brackets?
Are you a homeowner with a tile roof and don’t know how to mount a solar panel on a roof?
If so, you’ve probably realized that tile roof solar bracket installation comes with unique challenges. Where do you start? What tools do you need? How to avoid common mistakes like unstable mounts or roof damage? The main factors you will focus on are the cracked tiles during drilling, poor waterproofing, or unstable brackets that risk safety. Here this step by step guide breaks down how to install solar panel brackets properly, Today, We are guide you with the best installation solutions.
|
Table of contents |
|
1. Pre Installation Preparation 2. Marking Brackets and Mounting Hooks |
Step 1: Pre Installation Preparation
1.1 Assess Your Roof (Know Its Limits)
Before buying any brackets, evaluating your roof to avoid mismatches. First, checking the roof type: Tile roofs need solar hook solutions to prevent cracking, metal roofs work with L feet or bolt solutions, and flat roofs require ballasted or penetrative mounts. Next, test load bearing capacity, most residential roofs can handle solar, but old roofs (over 20 years) may need reinforcement. Finally, mark rafters or joists with a stud finder or thermal imaging tool because aluminum roof hooks brackets must attach to these structural supports, not just roof sheathing.
Tile Cracking During Installation: The Most Frustrating Issue
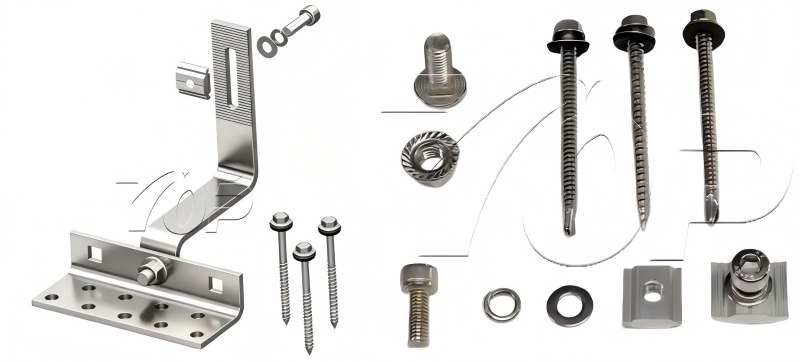
Topfencesolar produced roof hooks specially designed with L shape and C shape and more with adjustable to effectively solve this issue.
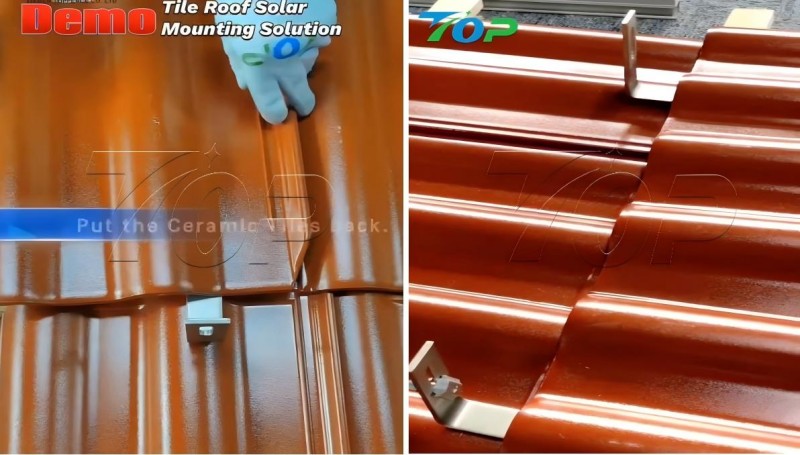
2.1 Mark Bracket Positions
Mark gaps between tiles to avoid drilling through them; and remove the tiles at the pointed position for hooks mounting ready.
2.2 Mount hooks on positioned wooden beams as structural supports
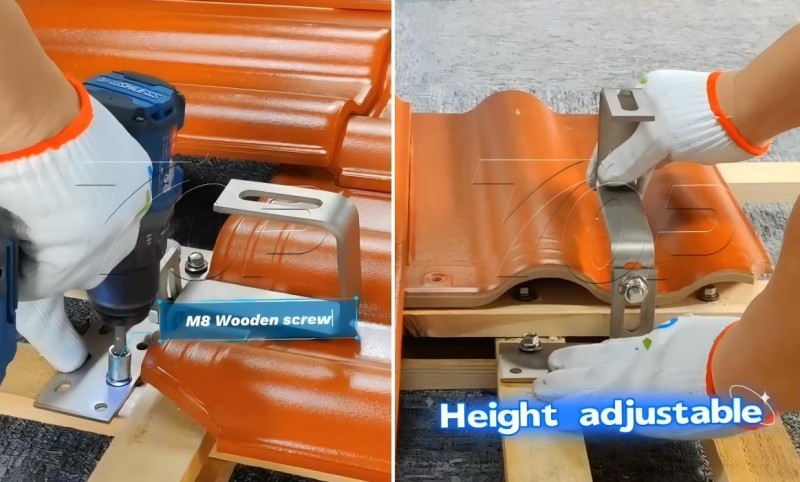
As example: For wood rafters, use ST6.3*80 wood screws and drive them at least 3 of fourth deep into the rafter. Fastening the roof hooks on wood rafters, then tighten fasteners with a torque wrench.
3. Sliding the Aluminum Rails on solar hooks.
It is the key steps for completing the solar panels mounting. There is slot on the rail facing the hooks T bolt fastener on top of hooks. Then tight the bolts to secure the rails. Rails and rails are connected with rail connectors to make the rail long enough on the rooftop.

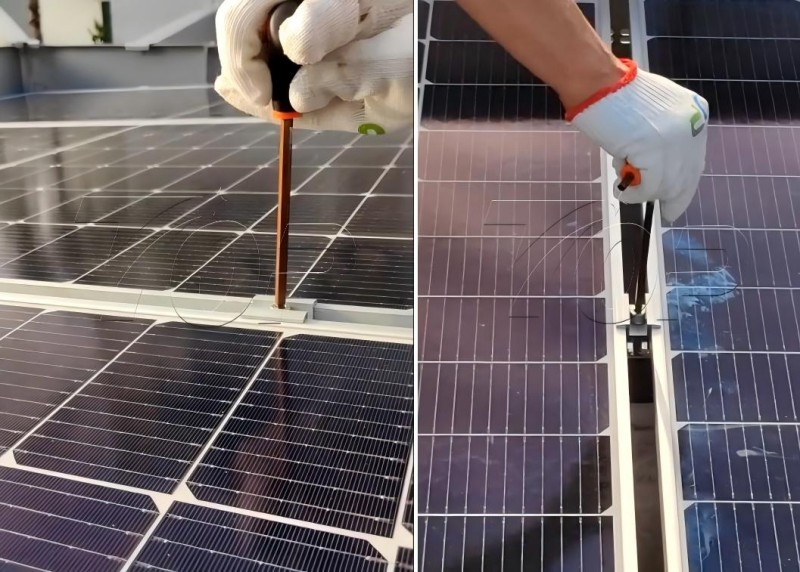
4. Solar Panels laying on the rails, complete the rail array mounting.
Once rails all be finished secured on the rails, the last thing is using the end clamp first to fix one side of solar panels. At the middle using a mid clamp to fasten panels. Those clamps will increasing the array strength and stability for solar panels.
The panels will be connected with DC cable by MC4 connectors connecting. Now the Solar Panels are already started generating electricity under sunshine.
Till now, are you still worry about solar panels on tile roof problems? By going through below keys you will be more confident on your roof solar system.
Key Considerations for Tile Roof Solar Bracket Installation
1. Bracket Material: Balance Weight and Durability for Tiles
Tile roofs have weight limits, because too heavy brackets can strain rafters and crack tiles. For avoiding cheap cast iron brackets (too heavy) or thin aluminum (not strong enough). The best choices are Topfencesolar Lightweight aluminum alloy which material using AL6005 T5, T6. Which is higher grade of Aluminum materials than from market.
2. Installation Angle: Work With Tile Roof Slopes
Tile roofs typically have slopes between 20° and 45°, this affects bracket angle and solar efficiency. Professional installers use slope gauges to measure your roof’s angle and use adjustable brackets to set the panel position, this avoids cutting or modifying tiles to fit panels.
3. Choose a Professional Team to Avoid Troubles
Tile roof solar bracket installation demands expertise in both solar and tile roof care. Topfencesolar engineer team know how to work with fragile tiles, locate rafters accurately, and apply the best matched solutions of tile specific waterproofing. A professional team will also handle permit applications that account for tile roof codes, and provide a warranty covering tile damage from installation. Contact us directly, Topfencesolar will offer the best and reliable system for your roof solar power plant.
Related News
- The Global EPC Sourcing Checklist: Managing Lead Times and Logistics for Solar Mounting Systems
- BIPV & Commercial Rooftops: Solving Waterproofing and Structural Integrity Challenges in Urban Solar
- Navigating Solar Certifications: Why UL 2703 and International Standards Matter for Project Bankability
- Maximizing Yield with Bifacial Modules: How to Select the Optimal Tracker for Enhanced Energy Output
- Wind Load and Coastal Engineering: Ensuring Your Ground-Mounted Solar Array Survives Extreme Weather
- Aluminum vs. Galvanized Steel: Choosing the Right Solar Mounting Structure for High-Corrosivity Environments
Leave me a message


