

How Can a Ground Mount Solar System Maximize Solar Output When Your Roof Isn’t an Option?
Abstract: A Ground Mount Solar System can be the smartest path to solar when roofs are shaded, crowded with equipment, structurally limited, or simply not ideal for long-term performance. But customers often worry about land requirements, permitting, wind and snow loads, trenching costs, maintenance access, and whether the system will actually deliver the energy they expect. This in-depth guide breaks down what matters most—from site selection and racking choices to installation workflow, durability, and upkeep—so you can plan a ground-mounted array with confidence and avoid expensive surprises.
Table of Contents
- Outline
- Why Choose a Ground Mount Solar System?
- Common Customer Pain Points and the Real Fixes
- Site Assessment Checklist That Prevents Regret
- Ground Mount Options and When Each One Wins
- Design Choices That Affect Performance for Decades
- Cost Drivers You Can Actually Control
- A Practical Installation Workflow
- Maintenance and Monitoring That Keep Output High
- How to Choose a Supplier Without Guesswork
- FAQ
- Next Steps
Outline
- Define what a Ground Mount Solar System is and why it’s often chosen over roof arrays.
- Address typical concerns: land use, shading, permitting, foundations, cabling, and long-term durability.
- Provide a decision framework for selecting racking style and site layout.
- Explain design and engineering choices that protect output and reduce maintenance.
- Share an installation checklist and a supplier-evaluation checklist.
- Answer common questions buyers ask before committing.
Why Choose a Ground Mount Solar System?
A Ground Mount Solar System places solar modules on a purpose-built structure anchored to the ground rather than on a roof. That sounds simple, but it unlocks several benefits that directly solve real-world problems:
- Better orientation and tilt: You can aim the array at the best angle for your location instead of being stuck with roof pitch and direction.
- Cleaner airflow: Ground arrays often run cooler than roof-mounted panels, which can help energy production during hot periods.
- Easier access: Cleaning, inspection, and repairs are simpler—especially for large systems or sites where roof access is risky.
- Room to expand: If you expect future load growth (EV charging, heat pumps, additional buildings), adding more rows is usually straightforward.
If your roof is shaded by trees, crowded with vents/HVAC, nearing end-of-life, or not engineered for additional load, ground mounting isn’t a compromise—it’s often the best long-term choice.
Common Customer Pain Points and the Real Fixes
Pain Point 1: “I’m worried it’ll take up too much land.”
A well-planned Ground Mount Solar System doesn’t have to steal your usable space. You can place arrays along fence lines, on slopes that aren’t great for landscaping, or in low-traffic areas. The key is layout: row spacing, access aisles, and setbacks determine how “big” it feels. Ask for a plan that shows footprint, walkways, and future expansion zones.
Pain Point 2: “Permitting sounds like a nightmare.”
Permitting is manageable when you approach it like a checklist: property lines, easements, utility interconnection, and structural requirements. The most common delays come from missing site data—soil conditions, wind/snow load assumptions, and electrical routing. Provide accurate site details early and request drawings that match local requirements.
Pain Point 3: “Trenching and cabling will blow up my budget.”
Cabling costs are real, but controllable. The biggest levers are the distance to your main electrical panel/interconnection point, conduit routing complexity, and whether you can consolidate equipment. A smart design places combiner/inverter equipment strategically to reduce long runs without sacrificing safety or accessibility.
Pain Point 4: “What if it can’t survive storms?”
This is an engineering problem, not a guessing game. Specify racking rated for your area’s wind and snow conditions and match the foundation style to soil and site constraints. Most failures come from cutting corners on foundations, corrosion protection, or installation torque specifications—not from the panels themselves.
Pain Point 5: “I don’t want high maintenance.”
Ground systems can be low maintenance when you plan for vegetation control, drainage, and easy access. The goal is a site you can inspect without special equipment, with wiring protected from moisture and animals, and components placed where you can service them quickly.
Site Assessment Checklist That Prevents Regret
Before you choose racking or final sizing, treat the site assessment as the foundation of success. Here’s a practical checklist:
- Sun access: Identify shading by trees, buildings, fences, and seasonal sun angles. Morning and late-afternoon shadows matter.
- Terrain and drainage: Check slopes, low spots that collect water, and areas that erode after heavy rain.
- Soil conditions: Soil type influences foundation choice (pile-driven, ground screws, ballast, or concrete).
- Wind exposure: Open fields, ridgelines, and coastal areas may require stronger racking and deeper foundations.
- Snow considerations: Drifts and sliding snow can increase loads and affect row spacing.
- Access: Can installation vehicles reach the site? Will you be able to access it for maintenance?
- Electrical route: Measure distance to the interconnection point and identify obstacles (driveways, septic, irrigation lines).
- Local constraints: Setbacks, fencing needs, and visibility requirements vary; plan for them upfront.
When this checklist is done thoroughly, the rest of the project becomes predictable—in timeline, cost, and performance.
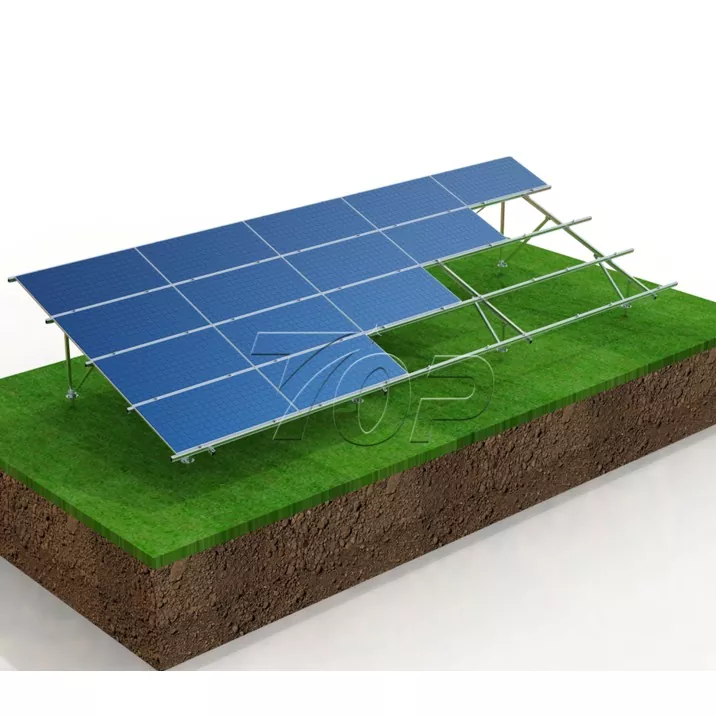
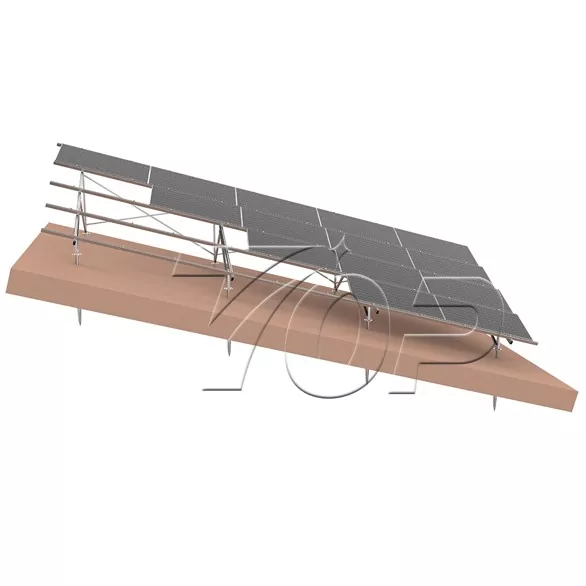
Ground Mount Options and When Each One Wins
Not every Ground Mount Solar System is built the same. Your site conditions and priorities determine the best fit.
| Option | Best For | Strengths | Watch Outs |
|---|---|---|---|
| Fixed-Tilt Racking | Most residential and commercial sites | Cost-effective, reliable, fewer moving parts | Must optimize tilt and row spacing carefully |
| Adjustable Seasonal Tilt | Owners willing to adjust a few times per year | Improves output during specific seasons | Requires safe access and consistent upkeep |
| Single-Axis Tracking | Large sites seeking higher annual yield | Can increase energy harvest compared to fixed tilt | More maintenance, higher upfront cost, needs clearance |
| Ballasted Ground Mount | Sites where ground penetration is limited | No deep foundation required in some cases | Heavier footprint, careful drainage and stability needed |
| Carport / Canopy Style Ground Structures | Parking areas or dual-use spaces | Generates power while shading vehicles/equipment | Typically higher structural cost |
For many buyers, fixed-tilt is the sweet spot: durable, straightforward, and cost-efficient. Tracking can be attractive, but only when the site and maintenance plan support it.
Design Choices That Affect Performance for Decades
High output isn’t just about panel wattage. The long-term success of a Ground Mount Solar System depends on design details that don’t look exciting on a quote—but matter immensely over time.
- Row spacing and shading tolerance: Tight spacing may reduce land use, but can cause self-shading and reduce output, especially in winter.
- Corrosion protection: Hot-dip galvanized steel or corrosion-resistant aluminum components help protect your investment, especially in humid or coastal regions.
- Foundation selection: Piles, screws, and concrete each have ideal use cases. A poor match can lead to settling, misalignment, and expensive remediation.
- Cable management: Clean routing, proper conduit, and animal protection reduce faults, water ingress, and unexpected downtime.
- Grounding and safety: A well-executed grounding plan reduces risk and improves system reliability in harsh weather.
- Service access: Leave room for inspection and repair. “Impossible to reach” components become expensive components.
If you want the system to stay stable for 20–30 years, prioritize structural integrity and protection against the environment just as much as the electrical design.
Cost Drivers You Can Actually Control
Pricing for a Ground Mount Solar System varies widely because sites vary widely. But several drivers are within your control:
- Site selection: Choosing a location closer to your interconnection point can cut trenching costs significantly.
- Vegetation strategy: Simple gravel borders, ground cover selection, or planned mowing paths can reduce ongoing maintenance.
- Standardized components: Using proven racking designs and readily available hardware can reduce labor time and simplify future repairs.
- Smart layout: A layout that balances access lanes and row spacing can protect performance while minimizing land disruption.
- Phased expansion: If budget is tight, plan conduit paths and space for expansion now, so you don’t pay twice later.
One practical tip: request a cost breakdown that separates racking, foundations, electrical routing, and labor. This makes it easier to spot where your project is expensive—and where you can simplify.
A Practical Installation Workflow
Even if you’re not installing it yourself, understanding the workflow helps you judge whether a contractor or supplier is organized.
- Pre-site verification: Confirm measurements, shading, and ground conditions before materials arrive.
- Foundation placement: Install piles/screws/concrete according to engineered spacing and depth requirements.
- Racking assembly: Align and torque structural members correctly; accuracy here prevents long-term stress and misalignment.
- Module mounting: Install modules with correct clamp positions and spacing; keep wiring neat and protected.
- Electrical integration: Route DC/AC wiring safely; install inverters and protection devices in accessible locations.
- Testing and commissioning: Verify grounding, insulation resistance, system monitoring, and expected output behavior.
Organizations like Xiamen Topfencesolar Co., Ltd. often support buyers with ground-mount racking solutions and configuration guidance, helping ensure the structure and layout match site conditions and project goals. The most reliable outcomes typically come from combining solid materials with correct engineering assumptions and disciplined installation practice.
Maintenance and Monitoring That Keep Output High
Most ground-mounted arrays don’t require constant attention, but they do benefit from a simple routine. Here’s what usually matters:
- Quarterly visual checks: Look for loose hardware, damage after storms, and signs of corrosion.
- Vegetation control: Prevent tall grass from shading lower edges and reduce fire risk in dry seasons.
- Cleaning strategy: Dust, pollen, or bird droppings can reduce performance; cleaning frequency depends on local conditions.
- Drainage inspection: After heavy rain, check for pooling water or erosion around foundations.
- Monitoring alerts: Use system monitoring to catch underperformance early (a single failed string can quietly reduce output).
A good rule: design the site so routine checks are easy. If you need special equipment to inspect basic components, the system will be neglected—and performance will drift.
How to Choose a Supplier Without Guesswork
If you’re comparing proposals for a Ground Mount Solar System, don’t focus only on price. Ask questions that reveal quality and competence:
- Is the racking rated for local wind and snow conditions?
- What foundation method is recommended, and why does it fit the soil?
- How is corrosion resistance handled for your environment?
- What is the plan for cable management and animal protection?
- Will the layout include access for maintenance and vegetation control?
- Can the design accommodate future expansion?
When a supplier can answer these clearly—with assumptions spelled out—you’re far less likely to face delays, change orders, or disappointing output.
FAQ
Q: How much land does a Ground Mount Solar System need?
A: It depends on system size, panel layout, row spacing, and access lanes. A thoughtful layout can reduce wasted space while protecting performance. The best approach is to request a footprint drawing that includes setbacks and maintenance access.
Q: Will a ground-mounted system produce more energy than roof solar?
A: Often yes, because you can optimize tilt and orientation and avoid roof shading constraints. Actual results depend on site sun exposure, design choices, and whether the roof would have been suboptimal.
Q: What foundation is best for ground mounting?
A: Pile-driven and ground screw foundations are common where soil allows. Concrete may be preferred in specific conditions. The “best” option matches soil, site access, local requirements, and structural loading assumptions.
Q: Is maintenance harder for ground mounts?
A: Usually easier than roof systems because access is simpler. The main recurring task is vegetation management, which can be planned for with smart site design.
Q: How do I reduce trenching and electrical routing costs?
A: Choose a site closer to the interconnection point when possible, and plan equipment placement to minimize long cable runs. A clear routing plan early in the project avoids expensive changes later.
Next Steps
A Ground Mount Solar System is one of the most flexible and dependable ways to generate solar power—especially when your roof isn’t suitable or when you want the freedom to optimize performance. If you want help selecting the right ground-mount structure, planning a layout that protects output, and choosing components built for your climate, reach out to Xiamen Topfencesolar Co., Ltd. today—contact us to discuss your site, goals, and the most practical configuration for your project.
Related News
- The Global EPC Sourcing Checklist: Managing Lead Times and Logistics for Solar Mounting Systems
- BIPV & Commercial Rooftops: Solving Waterproofing and Structural Integrity Challenges in Urban Solar
- Navigating Solar Certifications: Why UL 2703 and International Standards Matter for Project Bankability
- Maximizing Yield with Bifacial Modules: How to Select the Optimal Tracker for Enhanced Energy Output
- Wind Load and Coastal Engineering: Ensuring Your Ground-Mounted Solar Array Survives Extreme Weather
- Aluminum vs. Galvanized Steel: Choosing the Right Solar Mounting Structure for High-Corrosivity Environments
Leave me a message


