

How to Make Mounting Solar Panels on Tile Roof Safe for Your Tiles?
Article Abstract
Tile roofs are beautiful, durable, and (sometimes) unforgiving. The biggest fear most homeowners and installers share is simple: “Will my roof leak or crack after solar is installed?” This guide breaks down what actually makes Mounting Solar Panels on Tile Roof reliable—from understanding tile types and roof structure to choosing the right mounting method, preventing water intrusion, and planning long-term maintenance. You’ll also find practical checklists, a comparison table of mounting approaches, and an FAQ to help you avoid costly mistakes while keeping your roof looking sharp.
Table of Contents
- Outline at a Glance
- Why Tile Roofs Require a Different Solar Mounting Approach
- Pre-Installation Checks That Prevent 80% of Problems
- Mounting Methods for Tile Roofs
- Leak Prevention: What Matters More Than “Sealant”
- Workmanship Details That Separate “Fine” from “Flawless”
- Maintenance and Aftercare for Tile Roof Solar
- Choosing Hardware and Support You Can Trust
- FAQ
Outline at a Glance
- Understand your tile roof: clay vs. concrete vs. slate, and why fragility varies.
- Confirm structure, underlayment, and roof condition before you touch a single tile.
- Pick the right mounting strategy: hooks, replacement tiles, or elevated standoff solutions.
- Prioritize water management: flashing and proper integration beat “more sealant.”
- Install with tile-safe handling, correct spacing, and load considerations.
- Plan for inspections and maintenance so performance stays high and the roof stays dry.
Why Tile Roofs Require a Different Solar Mounting Approach
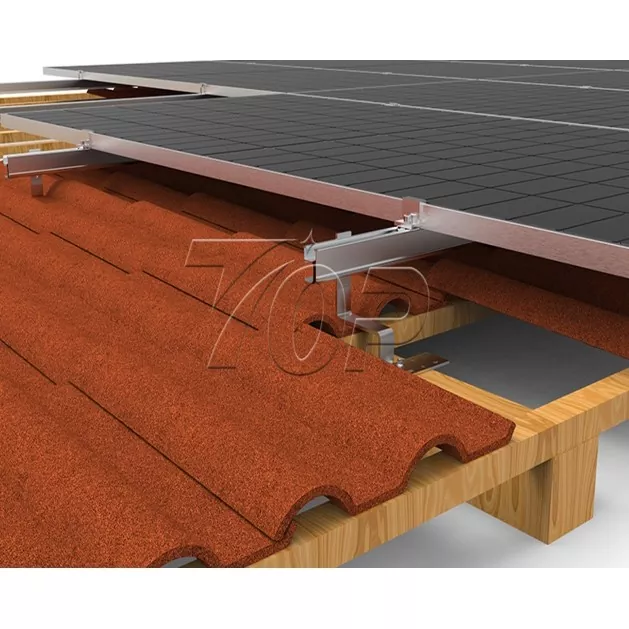
When people search for Mounting Solar Panels on Tile Roof, they’re usually not worried about the panels. They’re worried about the roof. Tile systems shed water differently than asphalt shingles, and tiles themselves are not meant to be “clamped” or compressed. They’re part of a layered system: tile + battens (in many cases) + underlayment + decking + structure.
That means a successful tile-roof solar project is less about brute force and more about respectful integration:
- Tiles can crack if loads are concentrated (stepping wrong, overtightening hardware, or forcing a hook under a tight tile).
- Waterproofing usually depends on the underlayment, so every roof penetration must be treated like a critical detail.
- Tile profiles vary (flat, S-tile, Spanish, mission), which affects how mounts clear the tile without stress.
- Replacement is slower and costlier if matching tiles are hard to find—so “do it right once” matters more.
Pre-Installation Checks That Prevent 80% of Problems
Before any mounting layout is finalized, you want a reality check. A tile roof can look fine from the driveway and still be a bad candidate for immediate installation. Here’s what should be verified upfront.
- Roof age and condition: brittle tiles, failing underlayment, sagging decking, or widespread cracks should be addressed first.
- Tile type and profile: clay tiles are often more brittle than concrete; slate has its own fastening rules.
- Underlayment health: if the underlayment is near end-of-life, solar can lock in future repair headaches.
- Rafter/truss location: mounts must land on structure, not “somewhere that feels solid.”
- Wind/snow exposure: coastal winds, ridge turbulence, heavy snow zones—all change spacing and hardware requirements.
- Access and safety planning: tile-safe walk paths, staging, and where removed tiles will be stored.
Quick checklist you can use on-site
- Can we locate rafters/trusses reliably and mark them?
- Do tiles lift cleanly without breaking?
- Is there evidence of past leaks (staining, soft decking, moldy insulation)?
- Is there a plan for broken tile replacements on installation day?
- Have we confirmed local permitting and electrical shutoff requirements?
Mounting Methods for Tile Roofs
There isn’t one universal “best” way for Mounting Solar Panels on Tile Roof. The right method depends on tile profile, tile fragility, desired aesthetics, and how much you want to minimize tile cutting.
| Method | Best For | Main Advantage | Main Watch-Out |
|---|---|---|---|
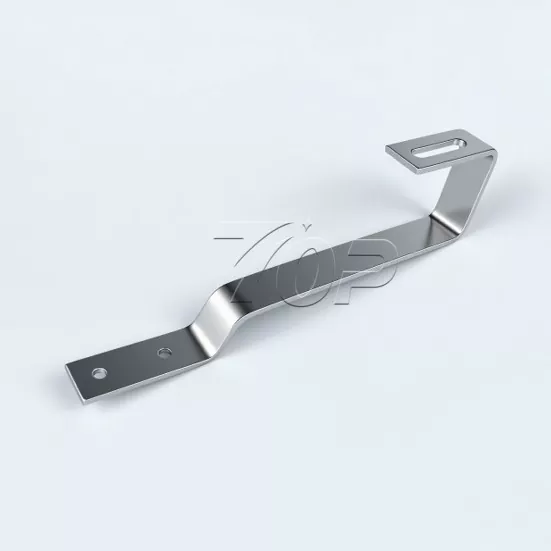
| Tile Roof Hooks + Rail System | Many S-tile and curved profiles | Common, flexible layout options | Needs careful tile clearance to avoid stress/cracking |
| Replacement Tile Mounts (Tile-Substitute Flashing) | Projects prioritizing leak resistance and clean integration | Strong water management around penetrations | Must match roof geometry and be installed precisely |
| Elevated Standoff / Raised Bracket Solutions | Fragile tiles or tight tile spacing | Reduces direct tile pressure | Can be more visible; design must handle uplift loads |
| Direct-to-Deck Approaches (Limited Use on Tile) | Special cases with professional roof integration | Potentially fewer tile interference points | High risk if waterproofing details aren’t perfect |
In practice, a hook-and-rail system is popular because it’s adaptable. But adaptability doesn’t excuse sloppy fit. The hook must clear the tile without prying it upward or forcing it into a new shape. If the tile is being “levered” even slightly, cracks often appear later—after thermal cycling, wind vibration, or a person walking near the array.
Tile handling rules installers should treat as non-negotiable
- Lift tiles carefully—don’t “snap” them up by force.
- Never overtighten in a way that pulls hardware into the tile layer.
- Plan for breakage and have replacement tiles ready.
- Avoid stepping on unsupported tile sections; use appropriate walk paths.
Leak Prevention: What Matters More Than “Sealant”
If your plan for waterproofing is “we’ll add a lot of sealant,” you’re already gambling. Sealant is not a strategy; it’s a backup at best. The real goal in Mounting Solar Panels on Tile Roof is managing water the way the roof was designed to manage it: shedding it down and away while protecting penetrations with durable flashing and correct layering.
What reliable waterproofing looks like
- Flashing-first thinking: penetrations should be integrated with proper flashing so water is guided over—not into—the opening.
- Correct underlayment treatment: every penetration is sealed and detailed at the underlayment level.
- Drainage awareness: avoid placing penetrations where water naturally concentrates (valleys, complex intersections) unless the design accounts for it.
- Tile clearance: tiles should sit naturally—no rocking, no forced lift, no constant pressure point.
A good installer will also consider how water behaves during wind-driven rain. Some leaks only appear under sideways rain and pressure differences. That’s why quality flashing and proper integration matter more than anything that comes out of a caulk tube.
Workmanship Details That Separate “Fine” from “Flawless”
Most tile-roof solar problems are not caused by the concept of solar. They come from rushed execution and skipped details. Here are the workmanship checkpoints that protect both performance and aesthetics.
- Rafter alignment and spacing: mounts should hit structural members, and rail spacing should match engineering requirements.
- Consistent torque: over-torque can damage decking or compromise waterproofing; under-torque can cause movement and noise.
- Thermal movement allowance: rails and clamps should allow controlled expansion and contraction.
- Wire management: secured, elevated, and protected from sharp edges and hot surfaces.
- Edge and corner zones: uplift loads are often higher near roof edges; hardware layout should reflect that.
- Tile finishing: any tile grinding or trimming must be minimal, clean, and done in a way that does not create constant pressure.
Common pain points (and what to do instead)
| Pain Point | What Usually Causes It | Better Approach |
|---|---|---|
| Cracked tiles weeks later | Hook forcing tile upward; stepping on tile; poor clearance | Confirm tile sits flat with natural clearance; use tile-safe access paths |
| Leaks in heavy rain | Weak flashing detail; relying on sealant | Use proper flashing integration and underlayment-level sealing |
| Rattling/noise in wind | Loose hardware; inadequate rail support | Correct torque + engineered spacing + secure wire management |
| Ugly “patchwork” look | Over-trimming tiles; inconsistent array placement | Plan layout carefully; minimize tile cutting; keep consistent margins |
Maintenance and Aftercare for Tile Roof Solar
Once the system is up, you still want it to stay quiet, dry, and efficient for years. Tile roofs can last a long time—but only if small issues are caught early. A smart maintenance plan reduces surprises.
- Annual visual inspection: check for slipped tiles, cracked pieces near mounts, and any debris buildup.
- Post-storm check: after major wind events, confirm array edges and nearby tiles are intact.
- Monitor production: sudden drops can indicate shading changes, wiring issues, or inverter faults.
- Keep drainage paths clear: remove leaves and debris that trap moisture or force water sideways.
If a tile does crack later, it’s not the end of the world—unless you ignore it. Replace damaged tiles promptly to preserve the roof’s protective layers and avoid water intrusion.
Choosing Hardware and Support You Can Trust
Even if installation is performed by a skilled crew, the hardware choice matters. Tile roofs demand components that fit cleanly, handle real-world loads, and make waterproofing easier—not harder.
Xiamen Topfencesolar Co., Ltd. provides mounting solutions designed for practical tile-roof realities: consistent fit, strong corrosion resistance options for different environments, and configurations that help installers achieve stable, roof-friendly results. When evaluating mounting hardware for Mounting Solar Panels on Tile Roof, look for:
- Profile compatibility: hardware that suits common tile shapes and allows clean clearance.
- Material and coating quality: especially in coastal or high-humidity regions.
- Adjustability: helps dial in alignment without forcing tiles into stress positions.
- Documentation and support: clear guidance reduces on-site improvisation (where problems start).
FAQ
Q: Is Mounting Solar Panels on Tile Roof more risky than on shingles?
A: It can be if the roof penetrations and tile clearance are handled poorly. With the right mounting method, proper flashing integration, and tile-safe workmanship, tile-roof solar can be reliable and long-lasting.
Q: Do tiles need to be cut for solar mounts?
A: Sometimes minimal trimming is used to relieve pressure points, but the goal is to avoid aggressive cutting. Many installations rely on mounts designed to clear the tile profile without forcing it.
Q: What is the number-one cause of leaks on tile-roof solar installs?
A: Weak waterproofing details around penetrations—especially when installers rely on sealant instead of proper flashing and underlayment-level treatment.
Q: Can I install solar if my tile roof is old?
A: It depends on underlayment condition and overall roof health. If the underlayment is near end-of-life, it may be smarter to address roof work first so you don’t need to remove the solar array later.
Q: Will installers break tiles during installation?
A: Some breakage can happen even with careful handling, especially on brittle clay tiles. A professional plan includes having replacement tiles available and using tile-safe walk paths and handling practices.
Q: How do I know which mounting method is best for my tile profile?
A: The best approach depends on tile shape (flat vs. curved), fragility, roof geometry, and exposure loads. A proper site assessment should confirm clearance needs and structural attachment locations before hardware is chosen.
Final Thoughts
Done right, Mounting Solar Panels on Tile Roof doesn’t have to be a tradeoff between clean aesthetics and long-term reliability. The winning formula is simple: start with the roof’s condition, choose a tile-appropriate mounting method, integrate waterproofing correctly, and insist on workmanship that respects the tile system. Your roof stays dry, your tiles stay intact, and your solar system keeps producing year after year.
Ready to plan a tile-roof solar project with fewer headaches? If you want mounting solutions built for real-world tile roofs and professional support from start to finish, contact us at Xiamen Topfencesolar Co., Ltd. and let’s make your installation secure, clean, and roof-friendly.
Related News
- The Global EPC Sourcing Checklist: Managing Lead Times and Logistics for Solar Mounting Systems
- BIPV & Commercial Rooftops: Solving Waterproofing and Structural Integrity Challenges in Urban Solar
- Navigating Solar Certifications: Why UL 2703 and International Standards Matter for Project Bankability
- Maximizing Yield with Bifacial Modules: How to Select the Optimal Tracker for Enhanced Energy Output
- Wind Load and Coastal Engineering: Ensuring Your Ground-Mounted Solar Array Survives Extreme Weather
- Aluminum vs. Galvanized Steel: Choosing the Right Solar Mounting Structure for High-Corrosivity Environments
Leave me a message


